This is the second part in our guide in getting Watchguard Single Sign on working in your active-directory environment.
See here for links to Part 1 and Part 3
Last time we covered installation of the SSO server agents on your server infrastructure, now we need to push the SSO client out to end users and allow the agent through Windows Firewall in a simple to manage manner.
Pushing the SSO Client out to end users
Once the servers have been configured you can add the client to the end users. The servers will pick up most requests anyway, but the SSO client on end user PC is for the more special cases or where your users don’t have a standard configuration.
Locate the “WG-Authentication-Client_11_7.msi” file you downloaded earlier. Upload this file to a location on your network that can be accessed by “Authenticated Users”.
When the GPO is applied on the end users pc, the computer makes the connection to the network share as the computer hostname not the user.
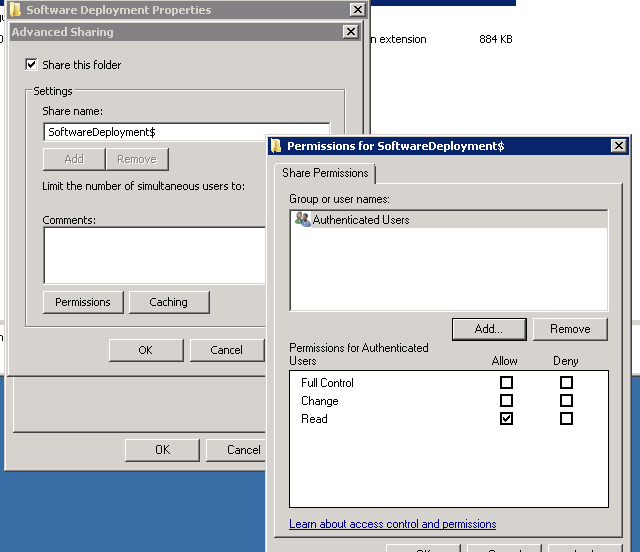
Typically I setup a “SoftwareDeployment” share just for these sorts of things, you can hide it and stop users from installing whatever software by adding a $ to the end of the sharename, dont forget to add “authenticated users” to the share and NTFS permissions for the folder.
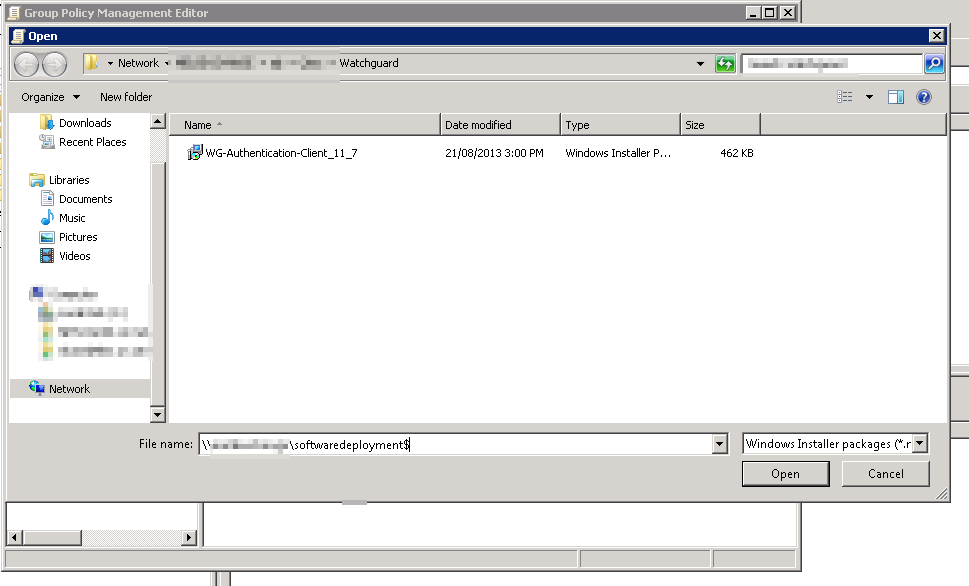
Hidden Share example: \server\softwaredeployment$
On your domain controller start your group policy editor
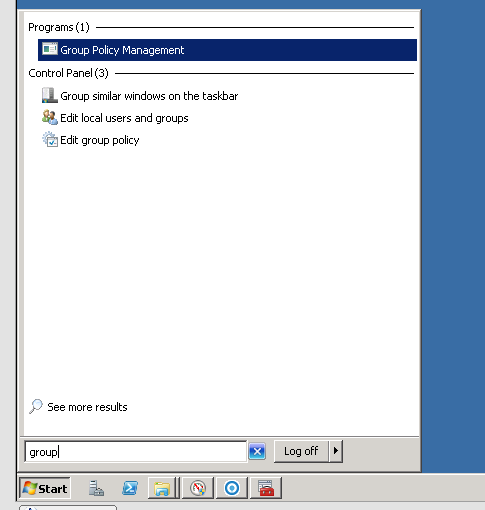
In windows 2008+ you can search for “group policy” and select “Group policy management”
In windows 2003, Start MMC and add the group policy management snap in
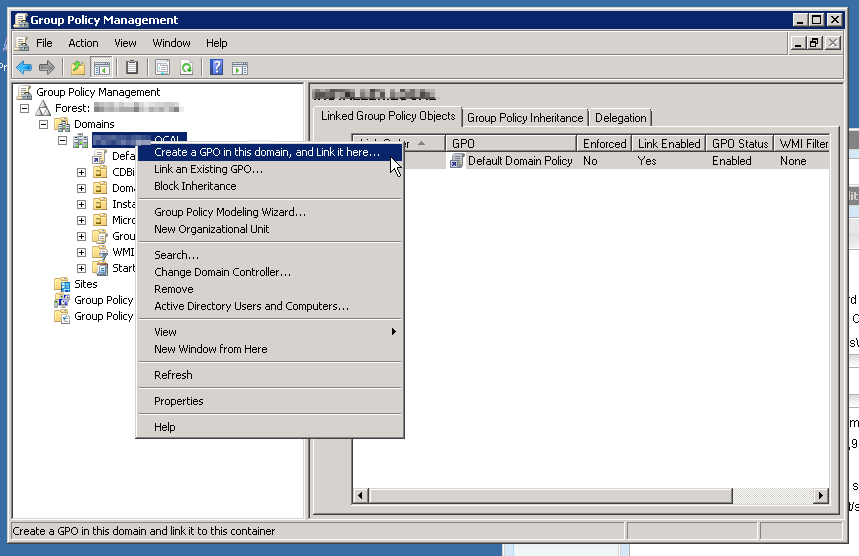
Expand your forest and locate the domain you wish to deploy the client into. Right click on the domain and click “Create a new GPO in this domain, and link it here”
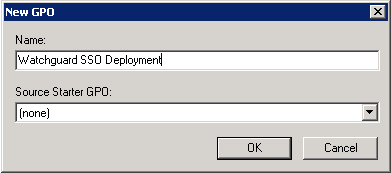
Name the GPO something meaningful and click OK
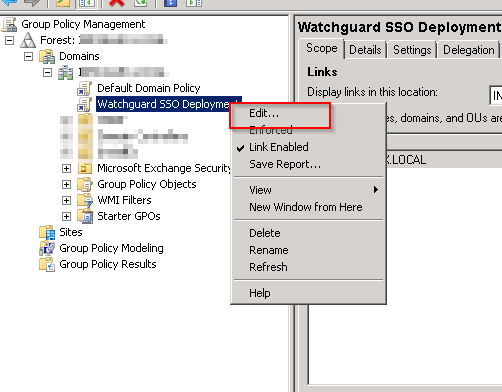
Right click the new GPO and click “Edit…”
All the changes should be done under computer configuration so all computers in the domain take the policy, you can prevent certain OU’s from using this policy if required.
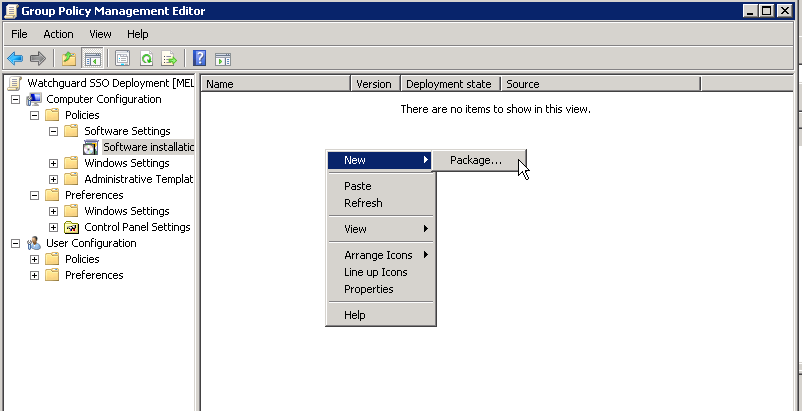
In the GPO editor under “Computer Configuration > Policies > Software Settings > Software Installation” Right click in the whitespace and select “New > Package…”
And browse to the MSI file making sure to use its network share. Keep in mind as mentioned before this network share needs to be accessible from anywhere you want the SSO agent to work from. Multiple site businesses with a single Watchguard for Wan access may consider using a DFS share or similar to speed up installation on boot.
Select the Assigned deployment and click OK and that’s the software deployment configuration complete.
Adding a Windows Firewall exclusion for the SSO agent
Now we need to open port 4116 on Windows Firewall
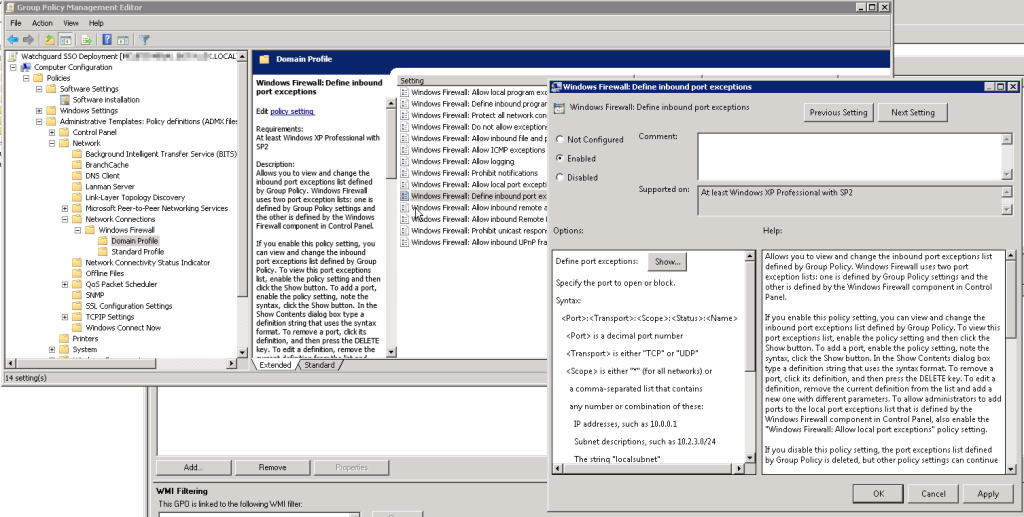
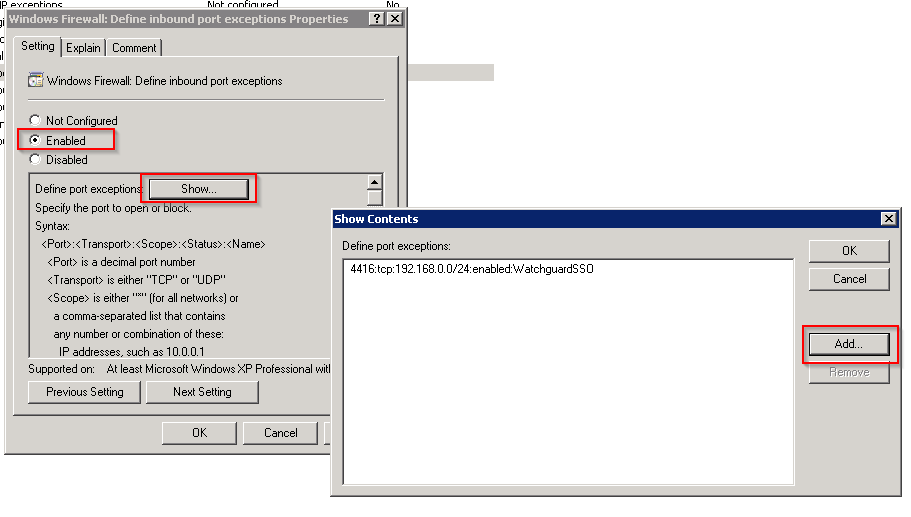
In the GPO editor that we have open from the previous step navigate to “Computer Configuration > Administrative Templates > Network > Network Connections > Windows Firewall > Domain Profile” and configure the “Windows Firewall: Define inbound port exceptions” policy
Once you enable this policy the “Show” button will be enabled
Click on the “Show…” button and add the following rule replacing 192.168.0.0/24 with your own range. For multiple ranges separate the networks with a comma
“4116:tcp:192.168.0.0/24:enabled:WatchguardSSO”
Close the rule and the policy editor.
Head on over to the “Settings” tab for the new policy and verify the settings are correct paying attention to the port numbers and network path of the install media.
Now we need to force a group policy update and AD replication.
Note: depending on your AD configuration this can take some time
Run the command “GPupdate /Force” to force your GPO’s to be pushed into the SYSVOL policies folder. If asked if logging out or rebooting the computer is okay, just answer no for now.
Then force a replication between all your AD controllers by running the command “repadmin /Syncall” this should complete with “SyncAll terminated with no errors” or something along the lines of replication in progress. If you receive any errors or permission denied, ensure you are using an administrative CMD window and FRS/DFS are both running. Otherwise refer to an Active Directory specialist.
Testing the Deployment
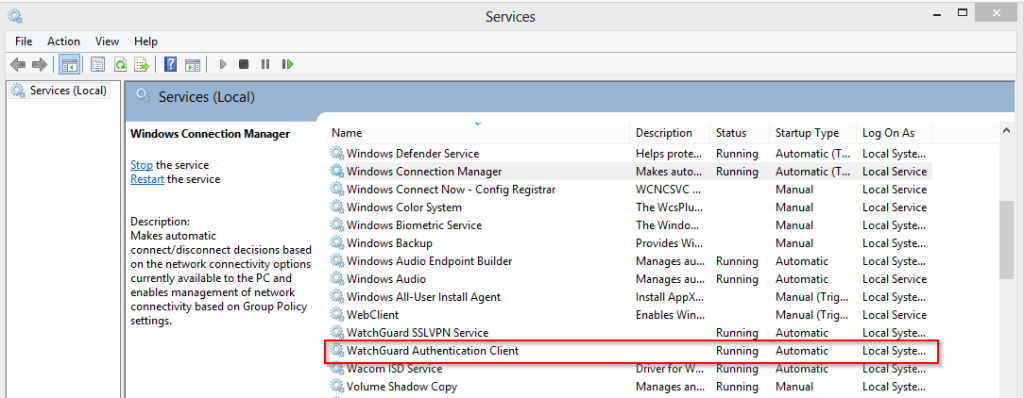
On and end user PC run the “Gpupdate /force” command and reboot when asked to. Upon reboot the computer should automatically download and install the WG SSO agent from your network share, Open the firewall ports required and start answering requests. You can check if the agent installed and is running by looking for the “Watchguard” folder in the Program Files folder on the test machine.
Note: if you dont run GPupdate /Force on the end user PC’s they will pickup new GPO’s in 90 minutes +/- 30 minutes by default.
That’s it for Part 2, so far we have obtained and installed all the relevant software for both the servers and clients. In part 3 we will configure the XTM appliance to make it all come together.


Where is part 3?
you won’t let me delete my comment so I will say never mind, I found the link near the top of the page.
Sorry, Jeff. My bad there. I’ve thrown a link in at the bottom for anyone looking for it.
Pingback: Watchguard SSO Made Simple(er) Part 1 | Skype4BAdmin.com
Pingback: Watchguard SSO Made Simple(er) Part 3 | Skype4BAdmin.com