Update: Part two is over here
For anyone that knows me, they know it’s no secret I’m a fan of “Team Blue” (Audiocodes), so with the announcement of the Audiocodes CloudBond for Office 365 I was a little giddy to get my hands on one, especially as the days of PSTN dialling in Cloud PBX are a long long way away for us dirty convicts here in Australia.
I should point out here that CloudBond isnt Cloud Connector Edition (CCE) in a box with a gateway. It’s a full onprem section of a hybrid deployment with a frontend, edge and domain controller using forest trusts to enable your users, more about that in part 2. But if your looking for a simple CCE in a box. they have that too.
http://www.audiocodes.com/solutions/microsoft/microsoft-cloud-connector-edition-cce
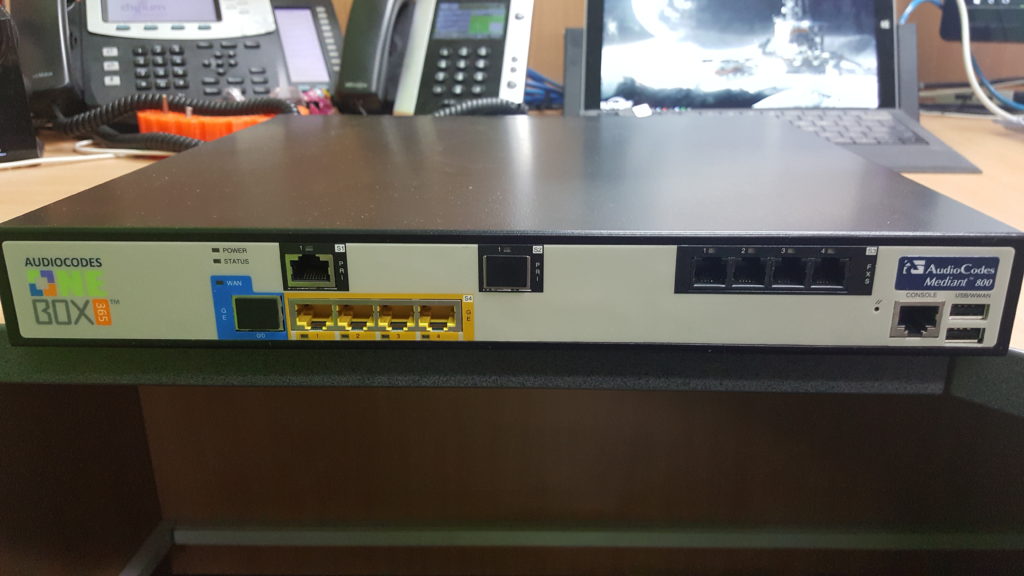
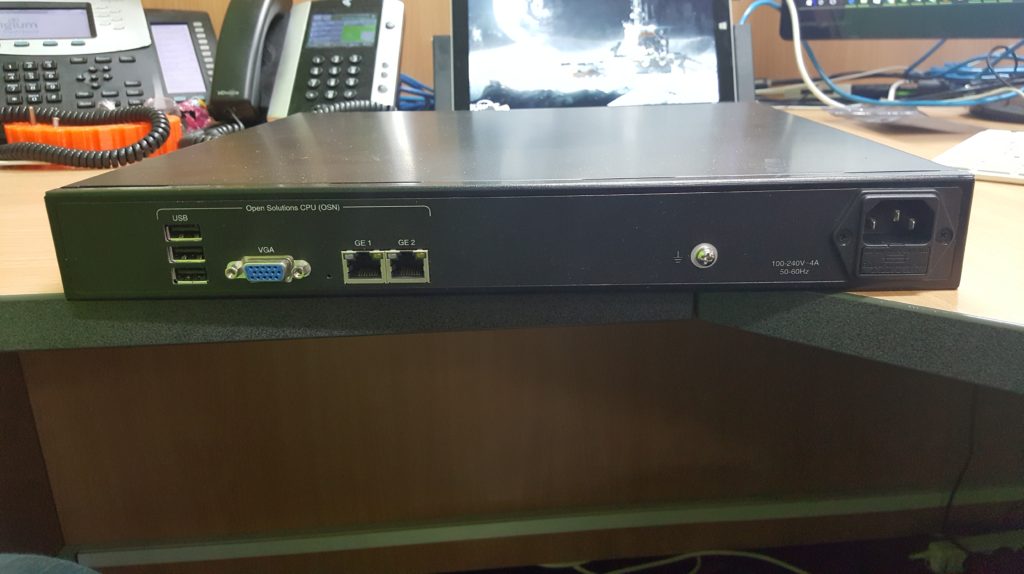
The unit itself
I received my demo unit after it had been on loan to another party, whom among not factory defaulting the unit before sending it back to the distributor, infected the installation media with malware (I should point out this is no fault of Audiocodes) So whilst I waited for a new recovery image to download what was I supposed to do but “Take it Apaaaarrt” (Dave Jones fans rejoyce)
Electronics nerdy stuff here, skip forward to the next section if you just want to see how it works
The Cloud Bond Standard is based on the Audiocodes M800 series devices and its built with both modularity and reliability in mind. The Pro and Enterprise editions are built around a HP server for lager scale deployments where redundant powersupplies etc become a consideration
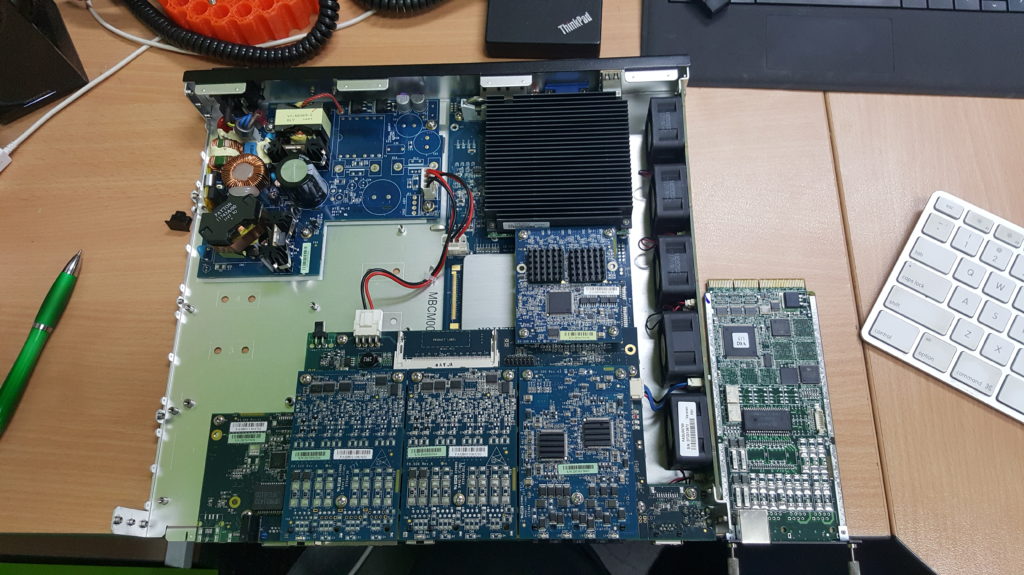
Whilst only having the option of a single power supply the standard unit is built with quality capacitors, all 105c rated with retaining clips and epoxy/hotsnot on all the major mechanical components. Significantly reducing the chance of failure and even little things that show quality like EMI suppression beads on the input and proper crimped and terminated earth connections are another good indication of quality.
Note the photo’s show a whole bunch of un-populated section on the powersupply module. That’s for a 48V rail, which this solution doesn’t need.
As with the M1000’s you can see a clear delineation between the voice routing section of the board and the computer section keeping with Audiocodes clear separation of gateway and Skype4B functions
For size comparision, you can see an M1000 ISDN PRI card beside the unit, the OSN (server) and Power supply are at the top, with the Gateway module down the bottom
Getting Started
My review Standard edition unit came with an Ivy Bridge Core i7 QM77 running at 2100mhz with 16GB of DDR3 in Dual Channel mode and a Plextor 256gb SSD. More than enough horsepower to run the suite of Skype4B virtual machines.
Getting updated firmware and operating system for the device was easy enough. After loading it on the USB key I popped into the BIOS (F2 during boot) and selected it as a boot device. (Save&Exit > Boot Override > “Your USB key”)
Whilst you’re in the BIOS you may be tempted to change the “Power Loss Function” in Configuration > EC Configuration to “Always On” I found this wasn’t needed as the Motherboard boots up as soon as power is applied anyway.
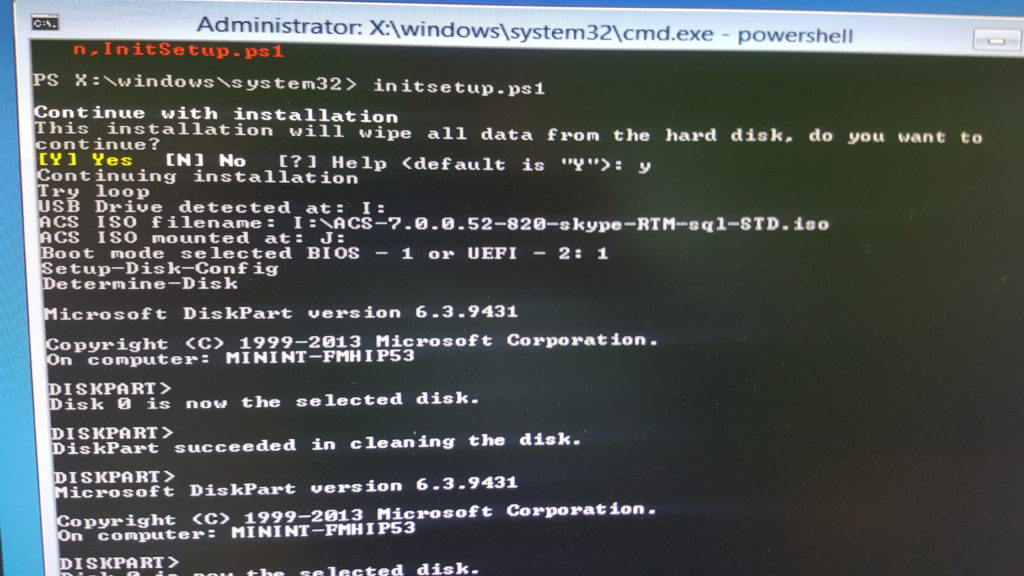
After leaving the BIOS I was greeted with the Windows ‘Betta Fish’ boot logo (remember, review unit) and a WinPE boot environment with a powershell script to perform the installation.
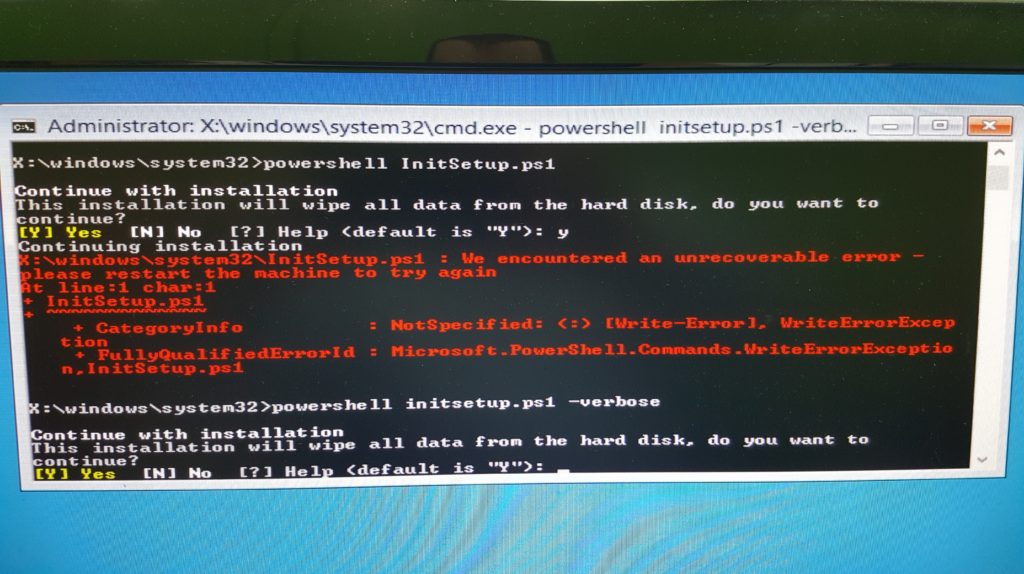
Unfortunately the WinPE environment failed to complete the installer, throwing a rather generic “We encountered an unrecoverable error” with a Write error and no more info.
I edited the InitSetup.ps1 powershell script and added a few Write-Verbose statements, eventually I realised I hadn’t labelled the USB stick correctly. Doh’
(FYI: I’ve sent an updated Powershell script to Audiocodes with some better error checking for the usb stick but it shouldn’t happen if you give it the right label! “ACSSetup“)

Sure enough, as soon as I renamed the USB key and re-ran the script the installation continued by repartitioning the onboard SSD, copying the appropriate install media and rebooting into a fully automated Windows Server 2012R2 installation.
A few reboots later and your dropped to a Windows Server 2012 R2 desktop with Hyper-V and DHCP installed.
I should note here that the Hyper-V management tools are not installed by default to try and keep overhead to a minimum.
In the next article (or two), I go through setting up the components and using Audiocodes take on the Skype Control Panel the “SysAdmin panel” as well as explaining how the platform integrates with both your existing AD and your O365 tenant.

Pingback: How I moved from the Powershell ISE over to Visual Studio for my Skype4B scripts Part 1 – Skype4BAdmin.com